So you've decide you would like to spice up your blog with a few fancy sidebar tags or images but just can't quite figure out how to accomplish it... well, no problem. Here are some helpful instructions to get you on your way....
{Before you start: There are a few things we'll need to do before we start...
1. For this tutorial you will need a selection of sidebar tags or images. You can find sets on Shabby blogs or you can make your own (to see how to make your own go here) Be sure you've already downloaded the tags you want to use on your blog by clicking on the download button . I like to save mine to my desktop so I can easily find them later.
2. Next, grab a blank piece of paper and pen/pencil and head over to your blog. Take a look around at the links, tags, and other goodies you have on your sidebars. Now is the time to decide what tags you'll want to use from the set you downloaded. Make sure to write down the order of the titles!
--------- START -------
*Begin by logging into your blog.
*Next click on "Design" found in the top right corner of your blog or navigate to your "Dashboard" and click on the "Design" tab.
Click on "Add a Gadget"...
*Begin by logging into your blog.
*Next click on "Design" found in the top right corner of your blog or navigate to your "Dashboard" and click on the "Design" tab.
Click on "Add a Gadget"...

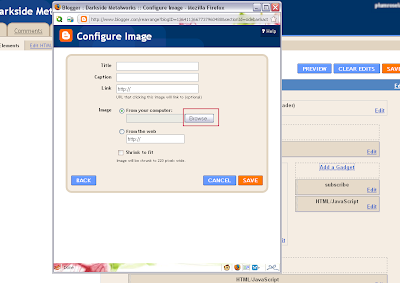
In the next pop-up window we will work with a few features. The first is to check the "shrink" box, this will ensure your image is as wide as your side bar...
Next click the "Browse" button and navigate to one of the frame images you have saved on your computer. Click on that image and then click "Open"...

After browsing your image and its loaded , go ahead and click "Save".
** Every gadget has a title , make sure to remove the title from the gadgets (you dont want 2 titles right?) and place the right image above the gadget! Make sure to not mix up the order of the images with the side bar!!
With that done you can click "View Blog" to see how your new tag looks and check that the link work properly. You'll probably want to wait until all of your new tags are in place before you delete any of the preexisting links you had on your blog before. That way there's no confusion and the links are still there in case you wrote down an incorrect link.
With that you should be all set.
With that you should be all set.


No comments:
Post a Comment
You are free to comment about anything , ask me questions if you want